 OnlyLoader
How to Resolve OnlyFans Login with X Cannot Change Email?

OnlyFans allows users to sign in through different methods, including linked third-party accounts where supported. However, some users may encounter a problem when logging in with X (formerly Twitter) and trying to change their registered email address. The email change option may be unavailable, verification messages may not arrive, or the account settings may not allow the update to proceed.
These issues can be frustrating, especially if you no longer have access to your original email address or want to improve your account security. Fortunately, there are several troubleshooting methods you can try to regain access to your account settings and resolve email-related problems. This guide explains how to troubleshoot OnlyFans login with X when you cannot change your email, along with a bonus method for backing up your OnlyFans media.
How to Resolve OnlyFans Login with X Cannot Change Email
Method 1: Check Your X Account and Login Method
If you originally registered for or linked your OnlyFans account using X, make sure you are signing in through the correct method. Using a different login option may lead you to a different account or prevent you from accessing the expected settings.
Steps:
- Open the official OnlyFans website in your browser.
- Choose the X login option if it is available for your account.
- Sign in with the correct X account and complete any requested authentication.
- Once logged in, open your OnlyFans account settings and check your current email address.
Method 2: Try Changing Your Email Through Account Settings
If you can access OnlyFans but cannot change your email address, first check whether the platform allows you to update it directly through your account settings. Depending on your account status and security requirements, you may need to verify your existing email or complete additional authentication.
Steps:
- Log in to your OnlyFans account, then open your profile menu and navigate to Settings.
- Look for the account or email settings section.
- Click the email field or the available edit option, enter your new email address, and complete the required verification steps.
If you cannot edit the email field, the edit option is unavailable, or repeated attempts fail, stop trying to avoid further issues. The account may require additional verification or assistance from OnlyFans support.
Method 3: Check Your Email Verification Messages
OnlyFans may require email verification before allowing certain account changes. If you don’t receive the OnlyFans verification email, check your spam folder and make sure you can still access your registered email account.
Steps:
- Check the inbox associated with your current OnlyFans account.
- Look in the spam, junk, promotions, and other filtered folders.
- Confirm that you entered the correct email address.
- If available, click Resend Verification Email and allow a few minutes for the message to arrive.
- If you still cannot receive the message, try a different browser or contact OnlyFans support.
Method 4: Clear Browser Cache or Try Another Browser
Sometimes, outdated browser data, cookies, or temporary website errors can interfere with login sessions and account settings. Testing another browser can help determine whether the issue is related to your current browsing environment.
Steps:
- Close the OnlyFans tab and sign out if possible.
- Clear the browser cache and cookies associated with OnlyFans.
- Restart the browser and revisit the official website.
- Alternatively, open OnlyFans in a different browser or a private browsing window.
- Log in OnlyFans again and see if you can now access the option to edit your email address.
Method 5: Contact OnlyFans Support
If the issue persists, contact OnlyFans support for help, especially if your account is linked to X, you can no longer access your registered email, or the email change option is unavailable.
2. Bonus: Back Up or Export OnlyFans Media with OnlyLoader
If you can still access your OnlyFans account but worry about losing your saved media, backing up content you’re permitted to download can help keep your files safe. OnlyLoader is a media downloading tool designed to help users save supported online images and videos to their computers.
How to bulk export OnlyFans media with OnlyLoader:
- Download and install OnlyLoader on your Windows or Mac computer, then launch it to access the main interface.
- Sign in with your authorized OnlyFans account inside OnlyLoader to let the software access the content available to you.
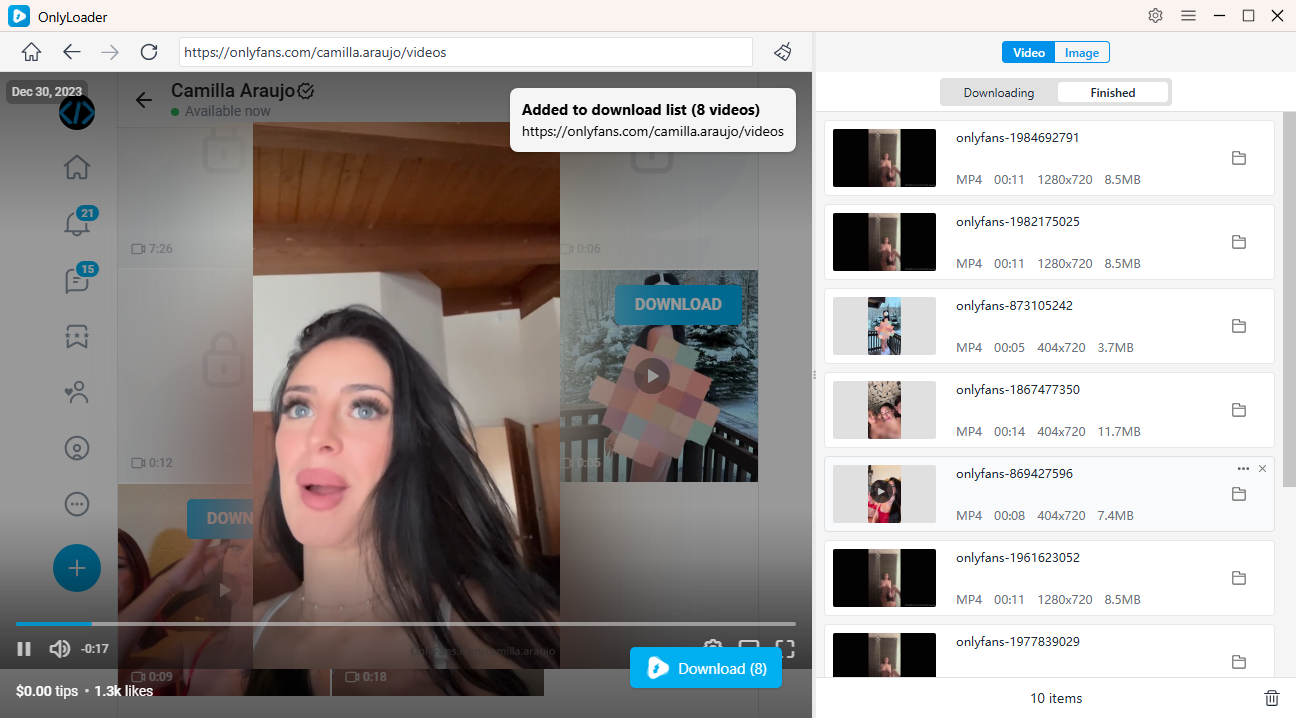
- To save OnlyFans videos, open the Videos section and play the content you want to download. OnlyLoader detects available videos, allowing you to select multiple files and download them in batches for greater efficiency.
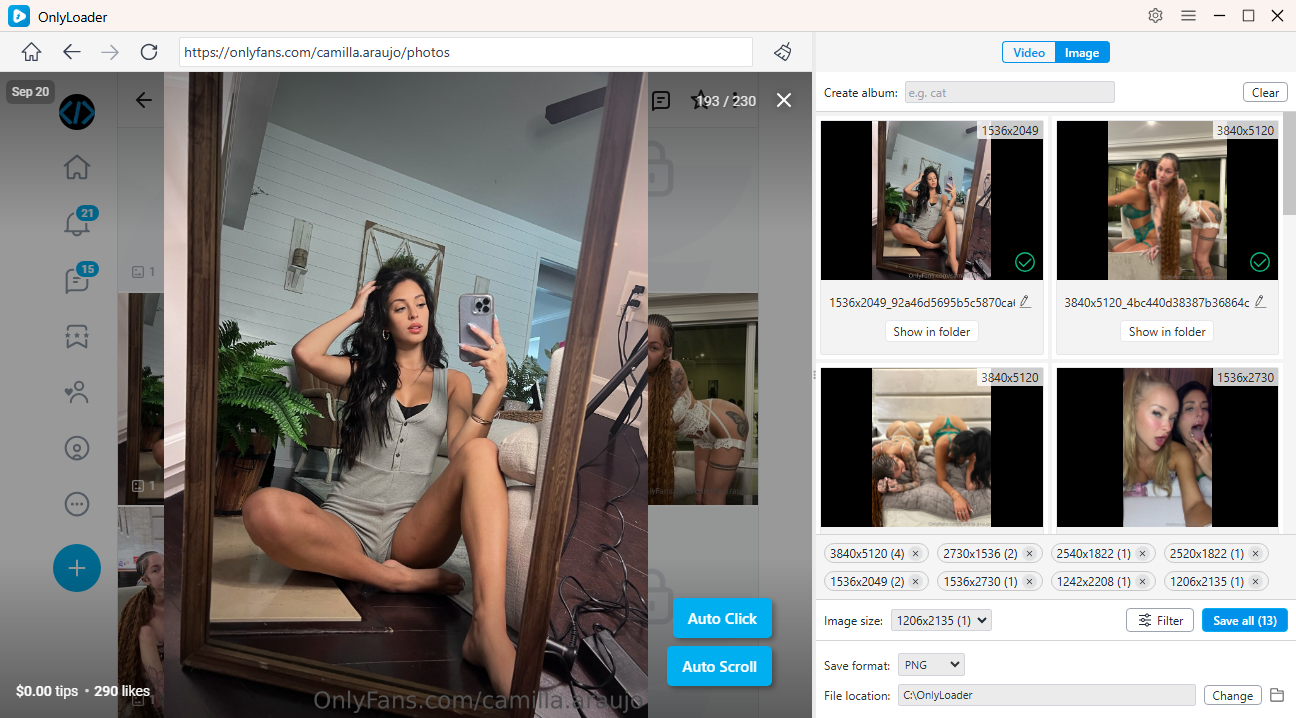
- For images, activate Auto-Click to scan the page for available photos. Select the images you want to keep, then download them all at once with a single click.
3. Conclusion
If you cannot change your email after logging in to OnlyFans with X, start by checking your login method, reviewing your account settings, and verifying your email access. You can also troubleshoot browser issues or contact OnlyFans support if the problem persists.
To protect your media from unexpected account access problems, consider using OnlyLoader to back up supported images and videos you are authorized to download. With a local media collection, you can organize and access your saved files more conveniently.